Boot loader and bare-metal
Before we dive in, a few words about boot loader and bare-metal, what exactly we will implement here.
Boot loader is a program that loads an operating system (usually, although boot loader can be used for other purposes). It is loaded into operating memory from persistent memory, such as a hard drive or whatever else.
Bare-metal stands for bare-metal programming. We will not use any layers of abstraction such as GRUB loader or C language or operating system (we don’t have it at this step). We will use Assembly language and nasm compiler and that’s it. We will interact with a system at the hardware level.
However, we apply simplifications here and implement a simple “Hello, World!” printing. This will be enough for understanding the principles.
BIOS
All begins here — BIOS (Basic Input/Output System). Let me copy paste explanation from Wikipedia:
For IBM PC-compatible computers, BIOS is non-volatile firmware used to perform hardware initialization during the booting process (power-on startup), and to provide runtime services for operating systems and programs. The BIOS firmware comes pre-installed on a personal computer’s system board, and it is the first software run when powered on.
What does it mean for us as “boot loader” developers?
It means that we already have some software on our PC which runs in the first place and we need to integrate with it. So, let’s start with getting to know what happens in there by pressing the Power button (short story).
You pressed the Power button… LED on your computer blinks… BIOS prepares to call POST procedure…
POST stands for Power-On-Self-Test and the purposes of this procedure are simple — check if everything works correctly. I bet you all saw it at least once in your life:

The interesting part here is where this sequence leads us to. This sequence of POST procedures culminates in locating a bootable device, such as a floppy disk, cd-rom, hard disk or usb stick, whatever.
Bootable device
How does BIOS recognize a device as bootable?
Turns out, by magic numbers. These numbers are 0x55 and 0xAA, or 85 and
170 in decimal appropriately. Also, these magic numbers must be located exactly
in bytes 511 and 512 in our bootable device.
You already got it; these magic numbers are just markers for BIOS that help to identify bootable devices from other devices.
When the BIOS finds such a boot sector, it loads it into memory at a specific
address — 0x0000:0x7C00.
That’s the picture, that’s the deal. We know where we need to store the program so that the BIOS can load it into operating memory.
Let’s write some code!
Preparing the environment
I don’t want to burden you, but before writing some code you surely must have an environment for this. I use MacOS, so the instructions below are for MacOS.
You need to have an Assembly compiler — nasm and an emulator for testing our boot loader — QEMU. We can install these via brew:
brew install nasm qemu
That’s all what we need. For sure, let’s write some code!
Boot Signature
Create a file boot.asm in your testing folder, where you will play with it.
The simplest boot loader with its signature, so BIOS can locate it, will look
like this:
Why? Remember the two “must have” rules for showing your device as bootable:
- Magic numbers are
0x55and0xAA; - Store them in 511 and 512 bytes in our boot sector;
dw 0xAA55 writes our magic numbers and times 510 — ($ — $$) db 0 makes sure
they will be written exactly at 511 and 512 bytes. How?
dw stands for “data write” so it’s just a stupid writing of 2 bytes, more
interesting is with times command.
We know that the boot sector must be:
- 512 bytes in size;
- 511 and 512 bytes must be
0x55and0xAA;
Based on that, we can make a mathematical formula, calculate how many zeros we
need to write after our code, so magic numbers will be at the correct place:
510 — CURRENT_ADDRESS — START_ADDRESS.
Just for an example, assume that we have 100 bytes of our code, 2 bytes of magic
numbers. Based on the formula above, we need to write 410 bytes of zeros after
our code, so magic numbers will be written at 511 and 512 bytes. That’s how the
command times 510 — ($ — $$) db 0 is working.
Let’s run it:
- Compile our assembly file
boot.asmvia nasm, running the command:nasm boot.asm -f bin -o boot.bin - Run the compiled binary file via QEMU:
qemu-system-i386 -fda boot.bin

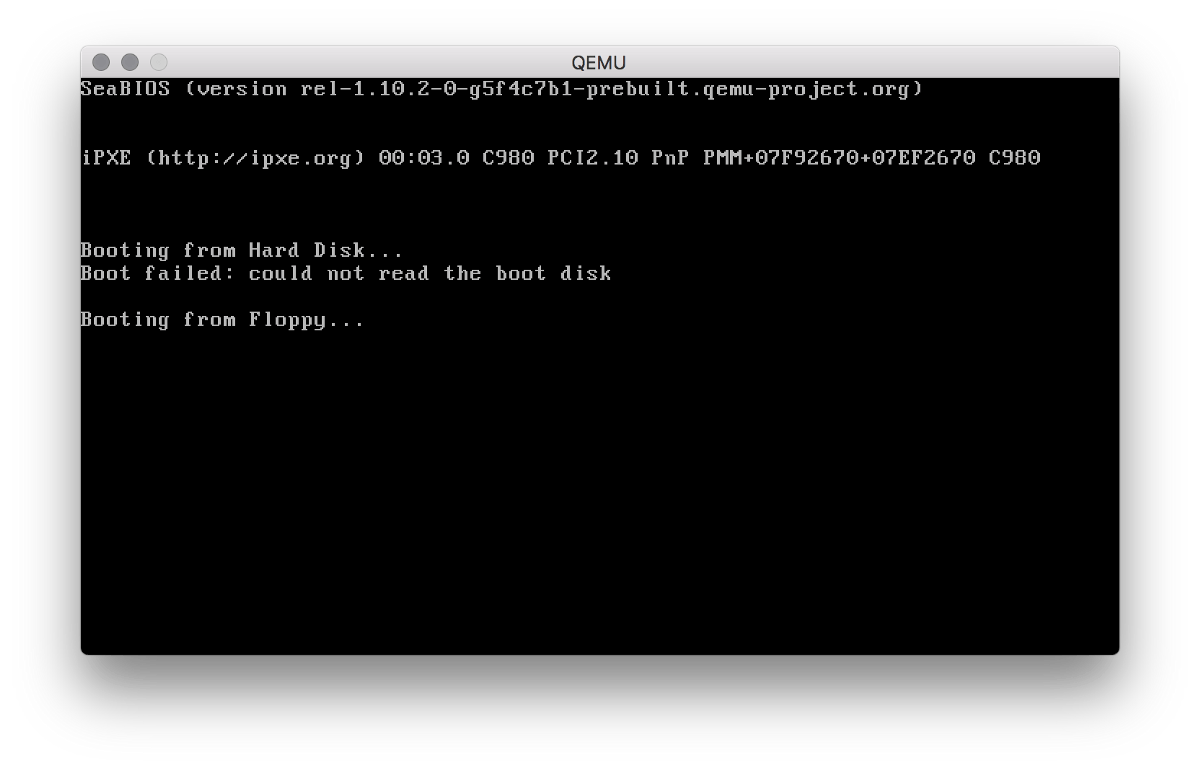
Since we have only one command for now: jmp $, we do nothing here, just an
infinite loop. That’s why it stops on Booting from Floppy... step. Let’s add
some action here — let’s print the “Hello, World” message.
“Hello, World”
Since we have boot.asm file with magic numbers, let’s change it to print
“Hello, World”. I’ll prepend each command with comments, so you’ll be able to
understand what exactly the command does:
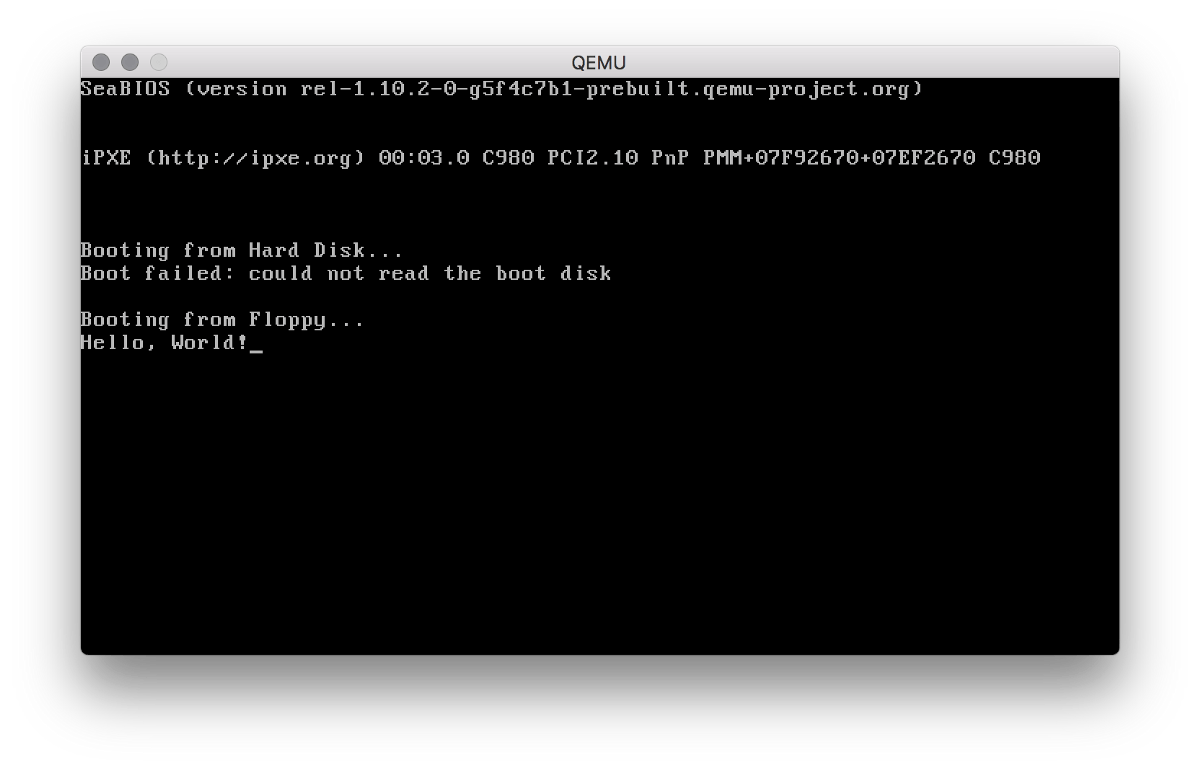
Compile this code nasm boot.asm -f bin -o boot.bin and run it
qemu-system-i386 -fda boot.bin.

As you can see, we have “Hello, World!” message in our boot sector. Goal achieved!
Bonus
In case you’re the laziest person in the world, I made a script you can use for running it on your Mac with one command:
curl https://gist.githubusercontent.com/ghaiklor/552d7f9c6c11e0c756ad305e55a0fff0/raw/cacfc2b3a84b84cc07d56e24e197ec51dc5d5133/hello-world-bootloader.sh | bash
Just copy the command above and run it in your terminal. I’m lazy, so I
performed none checks, just a linear execution. So, you need to have installed
brew and curl commands on your Mac.
Thanks
Leave your thoughts in the comments would you like to read more about it, or maybe you noticed some errors I didn’t. I’ll be glad to discuss anything with you all.
In case, you are interested in sources of my simple operating system, you can find them here — github.com/ghaiklor/ghaiklor-os-gcc.
Eugene Obrezkov, Senior Software Engineer at elastic.io, Kyiv, Ukraine.


Comments